Friday, July 31, 2015

Let's Talk About Garlic

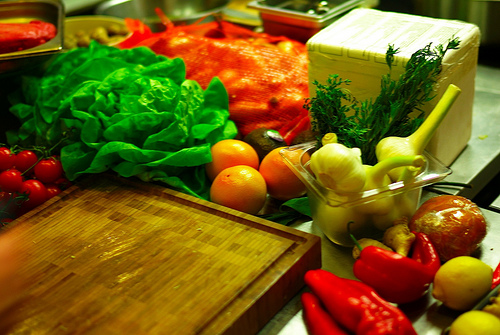
photo credit: Garlic via photopin (license)

I love garlic. Seriously.

Health Benefits


In my last post, I mentioned a tip on prepping your garlic a few minutes before cooking it. This is something I did not know for a long time, and I used to often press my garlic directly into the pan. Since changing the way I do this, in addition to the health benefits, I've noticed that the flavor of the garlic is better.

But what exactly are these health benefits? Here are a few, in no particular order.
  1. Garlic is a natural antibiotic and antifungal.
  2. Garlic helps prevent certain types of cancer.
  3. Garlic can help prevent food poisoning.
  4. Garlic is good for your heart.
  5. Garlic can help prevent blood clots.
  6. Garlic may help boost weight loss.
  7. Garlic fights acne.
  8. Garlic may help prevent hair loss.
Of course, this list is not nearly exhaustive. A simple google search would no doubt turn up plenty more benefits. 


Prepping Garlic


Lots of home remedies use raw garlic. Personally, I'm not a fan of raw garlic, but my husband has chewed it a time or two to help fight off a cold. But how do you get the best benefit out of the garlic you cook with? As mentioned before, you want to let it sit a few minutes. There are two compounds found in raw garlic (alliin and alliinase) which combine to form allicin. These compounds are released when the cell walls in the garlic are broken (when you cut, mince, press or puree your garlic). However, application of heat before they are given time to combine can destroy the alliinase, preventing the chemical reaction from ever happening and destroying many of the health benefits of eating garlic in the first place. In addition to health benefits, allicin is what gives garlic much of its flavor, so you're not doing your taste buds any favors either.

So how do I prep my garlic anyway? There are several ways, with their own benefits and drawbacks. My preferred go-to method is to break out my trusty garlic press. I use the one pictured here. I bought it at Ikea. It was cheap and simple and entirely made of stainless steel, so I figured it would last a while. Boy was I right. The little cup the garlic sits in found its way into the garbage disposal once and got a little dinged up, but overall the thing has stood up to every abuse I've thrown at it. I also love that I don't have to worry about peeling the garlic (a sometimes difficult task that often leaves your hands stinky) before dumping it in the press. Bonus!

I just put my garlic in the little metal cup, one clove at a time or two if they're really small, and squeeze the handle. I usually have a butter knife at the ready to scrape off the bits still clinging to the bottom, and to help scoop out and discard the paper from inside. This way I never have to actually touch the garlic oil and my hands remain stink free.

Of course, there are some times when I go ahead and peel and then roughly chunk up my garlic too. And other times when I just peel it and throw it in the pot whole. But for about 95% of my recipes, I've found the press makes things quick and easy, and best of all—tasty!

Thursday, July 30, 2015

Dinner Last Night: Korean Beef Rice Bowls


One of my favorite quick and easy recipes is Korean Beef and Rice from Six Sisters. This is a simple, quick recipe made from ingredients I almost always already have on hand. In fact, the only item that I had to actually add to my shopping list this week was the ground beef! I do change up a few ingredients though. Here's my version:

Ingredients

  • 3 cloves garlic, pressed (or minced)
  • 1 cup (dry) jasmine rice
  • 1½ cup any broth
  • 1 Tbsp oil
  • 1 lb lean ground beef
  • ½ cup brown sugar
  • ¼ cup soy sauce
  • ¼ tsp ground ginger
  • 1 tsp crushed red pepper
  • green onions, diced

Steps

  1. Begin by pressing (or mincing if you don't have a garlic press) your garlic. To get the best health benefits, always let your garlic sit for a few minutes after mincing it to give the alliin and alliinase time to combine and form allicin before applying heat. Set pressed garlic aside.
  2. Bring broth to boil in a medium saucepan. I used some leftover beef broth from earlier in the week, but have used chicken or veggie broth and it comes out just as well. This will give your rice some flavor and keep it from clumping.
  3. Once broth is boiling, stir in rice and cover. Reduce heat to simmer and allow to cook for 15 minutes.
  4. Heat oil in a large skillet over medium heat until runny. The original recipe calls for sesame oil, which I suppose would be more authentic, but I tend to use what I have on hand. Usually olive oil.
  5. Brown beef and garlic.
  6. Drain the fat (if any) and add brown sugar, soy sauce, ginger, and red peppers. Again, the original recipe calls for salt and pepper in this step, but I actually liked this better the time I forgot to add them, so now I never bother. There is plenty of flavor with the sweetness of the brown sugar, the saltiness of the soy sauce, and the bite of the red pepper.
  7. Mix well and simmer for a few minutes to blend the flavors.
  8. Serve over rice and top with plenty of fresh chopped green onions.

Wednesday, July 29, 2015

Just Getting Started


Welcome to my brand new blog, BunGirl Cooks.

I've been learning the art of cooking over the past few years and I love to try new things, so I thought it might be fun to share with the world. In this blog I plan to feature recipes, tips and tricks, and cooking-related product reviews.

As a kid, I never learned to cook. My mom says she had to keep my sister and I out of the kitchen because we both thought raw meat was "gross" and we'd refuse to eat it if we saw it before it was cooked. I'm still not a fan of the slimy feeling of raw meat, but I've gotten over it enough that I can handle it and cook with it.

Then I got married. My husband grew up in a single-parent home, and as the oldest child he did a lot of the "cooking" for his younger brothers. From what I gather, this mostly involved reading and following the directions on the back of the package. Neither of us had the slightest idea what real cooking was. For too many years, we'd eat fast food, hamburger helper or canned soups almost every night. If it required more than "open package, dump in pan and heat up" we did not do it.

Not too long ago, I started learning about nutrition and diet and what America's over-processed, a-bit-too-convenient food culture is doing to our health. I decided that it was time to start incorporating more fresh ingredients in my diet, and time to learn just what it is I'm putting into my body. Note: this is NOT a healthy food blog. I don't do low fat or low cholesterol. I don't avoid carbs. I love cheese, red meat, and pasta. Some of my recipes are healthy, but many are not. For now, I'm less concerned with proper nutrition and more concerned with reducing my reliance on overly-processed packaged foods.

Since my hubby's job keeps him working odd hours, and often I don't know exactly when to expect him home, I rely a lot on my crock pot. I love making soups and stews from scratch because it doesn't matter if they cook an hour longer than I expected. In fact, sometimes they're better that way! On the nights he's not working late, I like to do quick and easy meals so I still get to spend time with him instead of spending all evening in the kitchen. Often these are one-pan type meals.

I've also learned to love the art of meal planning. Every week I plan out 4-5 dinners (there are only two of us so we eat a lot of leftovers) and compile a single grocery list so I don't have to run out last minute to get an ingredient, nor do I have to wonder what to make for dinner tonight. This has made life so much easier!

On this blog I plan to share all of this and more. So I invite you to join me on my cooking journey and try some new things yourself!


photo credit: Truffle Box via photopin (license)